
My website was costing me $6 a month, so I decided to find a cheaper way to host it. Now I’m spending $0 and I have a pretty cool CICD pipeline. Here is how you can do it too.
Building a static website
Before I create this static website, I had a dynamic one built using WordPress. I was using the cheapest Digital Ocean Virtual Machine configuration, 1GB of RAM, 1 CPU, and 25GB of storage. The setup was costing me $5 a month plus $1 for the automatic backups.
Honestly, it was not that expensive, but finding a cheaper option was a fun ride.
The WordPress setup didn’t last long. I quickly realized that a static website would be enough for me. So I looked for static website generators, and I found exactly what I needed, Jekyll.
Jekyll
Jekyll generates websites from Markdown files. What I like the most about Jekyll is that I don’t need to care much about HTML and CSS. You can choose a free template from many options and you are good to go. You can see here an example of what a Jekyll template source code looks like.
Writing a blog post is quite simple. I create a new post on a specific folder, run the command below and open the URL prompted in the terminal.
jekyll build && jekyll serve --watch --livereload
Every time I save, the browser automatically refreshes the page and shows the latest changes. This quick feedback is awesome. You can find here more about the Jekyll command line usage.
Alternatives to Jekyll
Jekyll is not the only free website generator. There are other solutions out there, some of them even take care of the hosting for you. Examples of these tools are:
- Hugo: presented as the world’s fastest framework for building websites, Hugo is an open-source static site generator written in Go language.
- MkDocs: a static website generator geared towards building project documentation.
- Medium: software as a service (SaaS) that works as a social publishing platform.
- Hashnode: a SaaS for hosting blogs. It mainly focuses on tech blogs.
Hosting a static website for free
Hosting takes a big part of a website’s cost. Nowadays, there are countless inexpensive alternatives to hosting a website. During my investigation, I focused on 3 options.
- AWS S3: With the AWS free-tirer you can host a website for free for 12 months.
- GitHub Pages: Allows you to host sites for free using public GitHub repositories.
- Digital Ocean Apps: You can deploy 3 static sites for free using the DO Apps.
After comparing these alternatives I decided to use the Digital Ocean Apps because of two reasons. 1. It has a Global CDN included so the images are cached in different parts of the globe automatically. 2. the integration with GitHub is great it deploys my website in seconds after detecting a change in the repository.
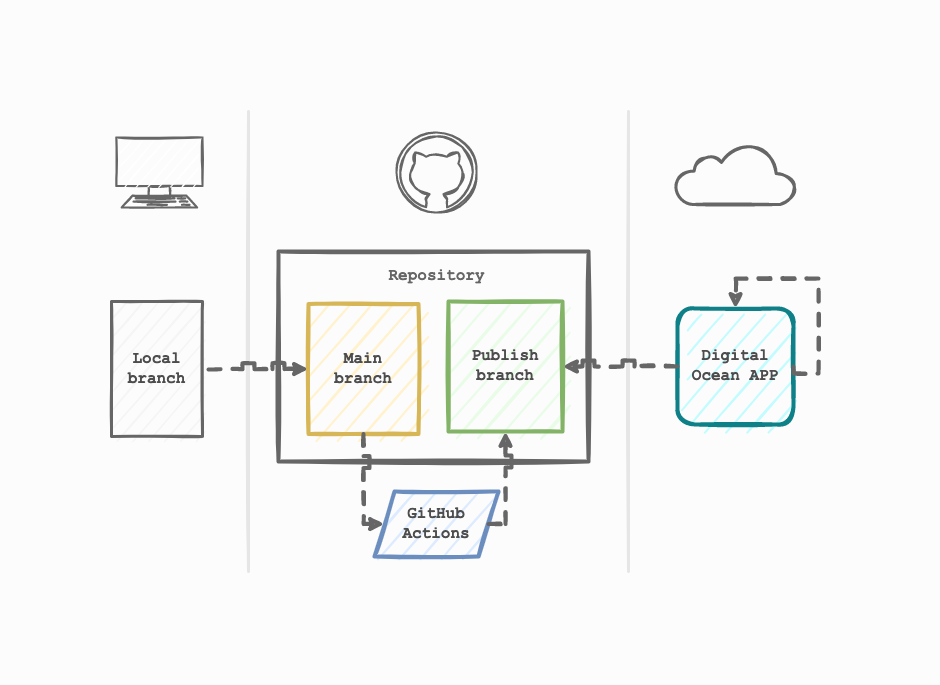
Architecture
Before diving into the implementation, let’s understand the path your website’s code will follow from the git push to the final stage of the deployment. Below we see the big picture of this architecture.
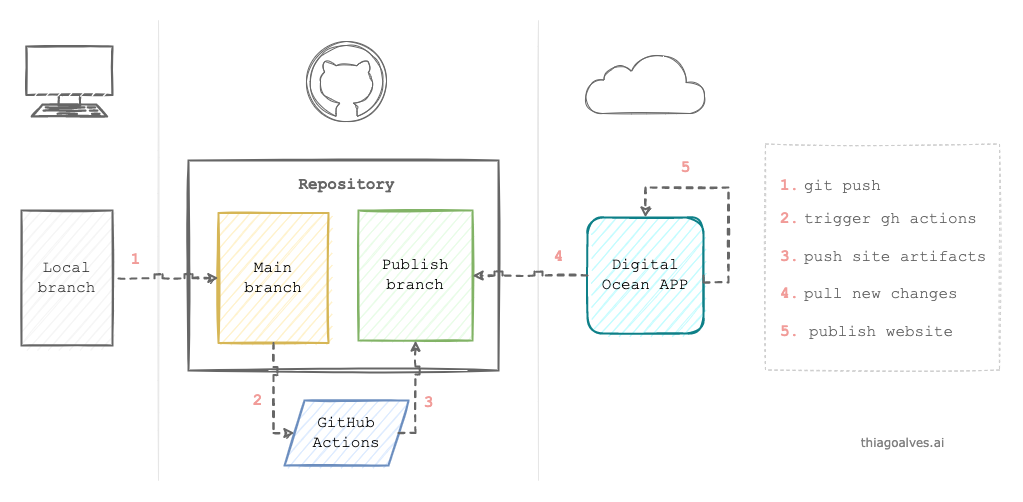 Diagram by the author
-
git push: Nothing special here. After you write a new blog post, for example, you push this new change to git
-
Trigger GitHub Actions: Once the change hits the main branch of your repository a GitHub Actions is triggered. This Action prepares a container with Jekyll installed and builds your website. The build’s result is a folder with the pages rendered as HTML files.
GitHub offers 1000 minutes of actions per month. It is more than enough for a blog since the build takes approximately 90 seconds, but be aware that this quota is shared amongst your repos. We will go through the GitHub Actions setup in the next section.
-
Push site artifacts: The artifacts produced by the build are pushed to a different branch In this example we call it publish. The idea is that only the automated process will push changes to this branch. It prevents broken changes to hit production up to a certain degree.
-
Pull new changes: The Digital Ocean app listens to all changes happening to the publish branch. You can see later in this post how to create a new App on DO and configure it.
-
Publish website: After pulling the latest changes the App will automatically deploy the website. The changes are propagated almost instantly.
So that was the overview, let’s now dive deeper!
GitHub Actions
I’m currently using the action jekyll-deploy-gh-pages to build my website. You can find this and other actions in the marketplace.
To use this action you first need to create the following folder structure in your project .github/workflows/. Be aware that the GitHub folder is hidden, so it needs the "." in the beginning.
Inside that folder, create a file called deploy.yml with the following content.
name: 'Automatic build'
on:
  push:
    branches:
      - main
    paths-ignore:
      - .gitignore
      - README.md
      - LICENSE

jobs:
  build_and_deploy:
    runs-on: ubuntu-latest
    steps:
      - uses: actions/checkout@v1
      - name: Build & Deploy to GitHub Pages
        env:
          GITHUB_TOKEN: $
          GITHUB_REPOSITORY: $
          GITHUB_ACTOR: $
          JEKYLL_ENV: production
        uses: BryanSchuetz/jekyll-deploy-gh-pages@master
A quick explanation of this deployment file: Every time GitHub notices a change in the main branch, except in the files under paths-ignore, it triggers a new job. This job runs the Action BryanSchuetz/jekyll-deploy-gh-pages@master explained before.
As we can see in this action’s source code, it pushes the result of the build to a branch called gh-pages.
Digital Ocean App
To create a new Digital Ocean app, you first need an account. You can create one with this link, which gives you $100 in credits and a few credits for me. Then, you just need to follow the steps below.
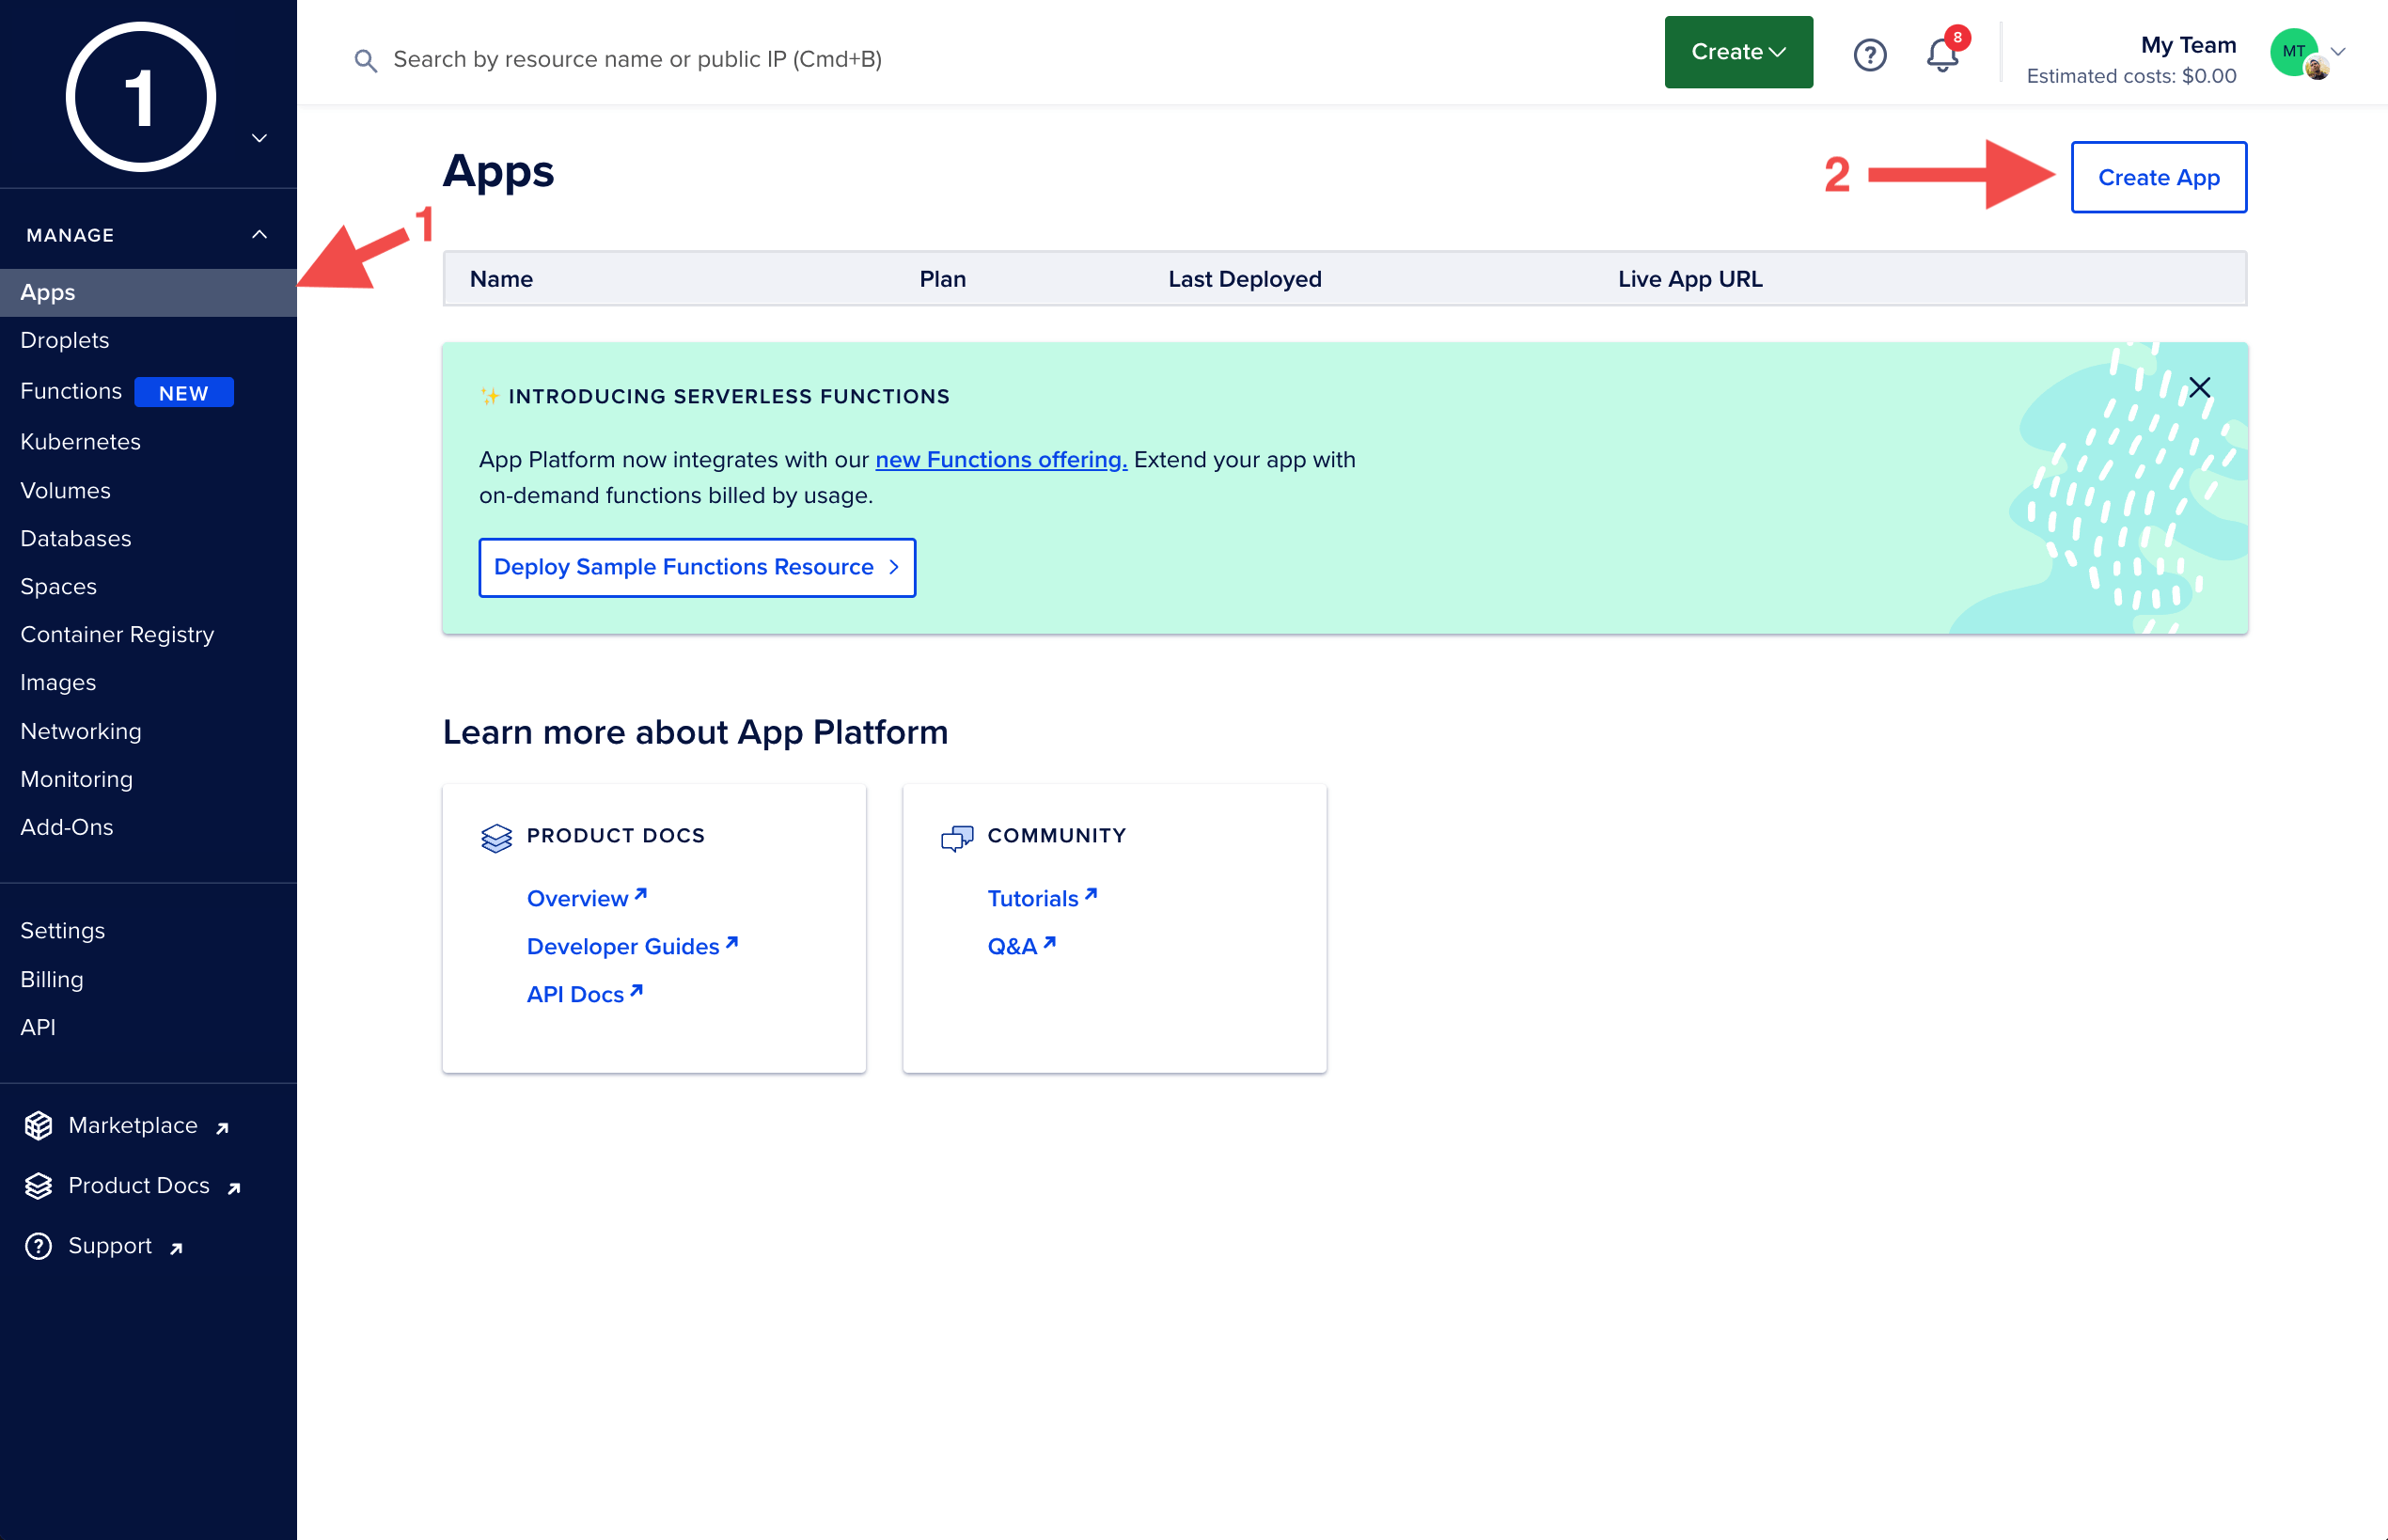
-
In the left panel, click on Apps and then Create App.
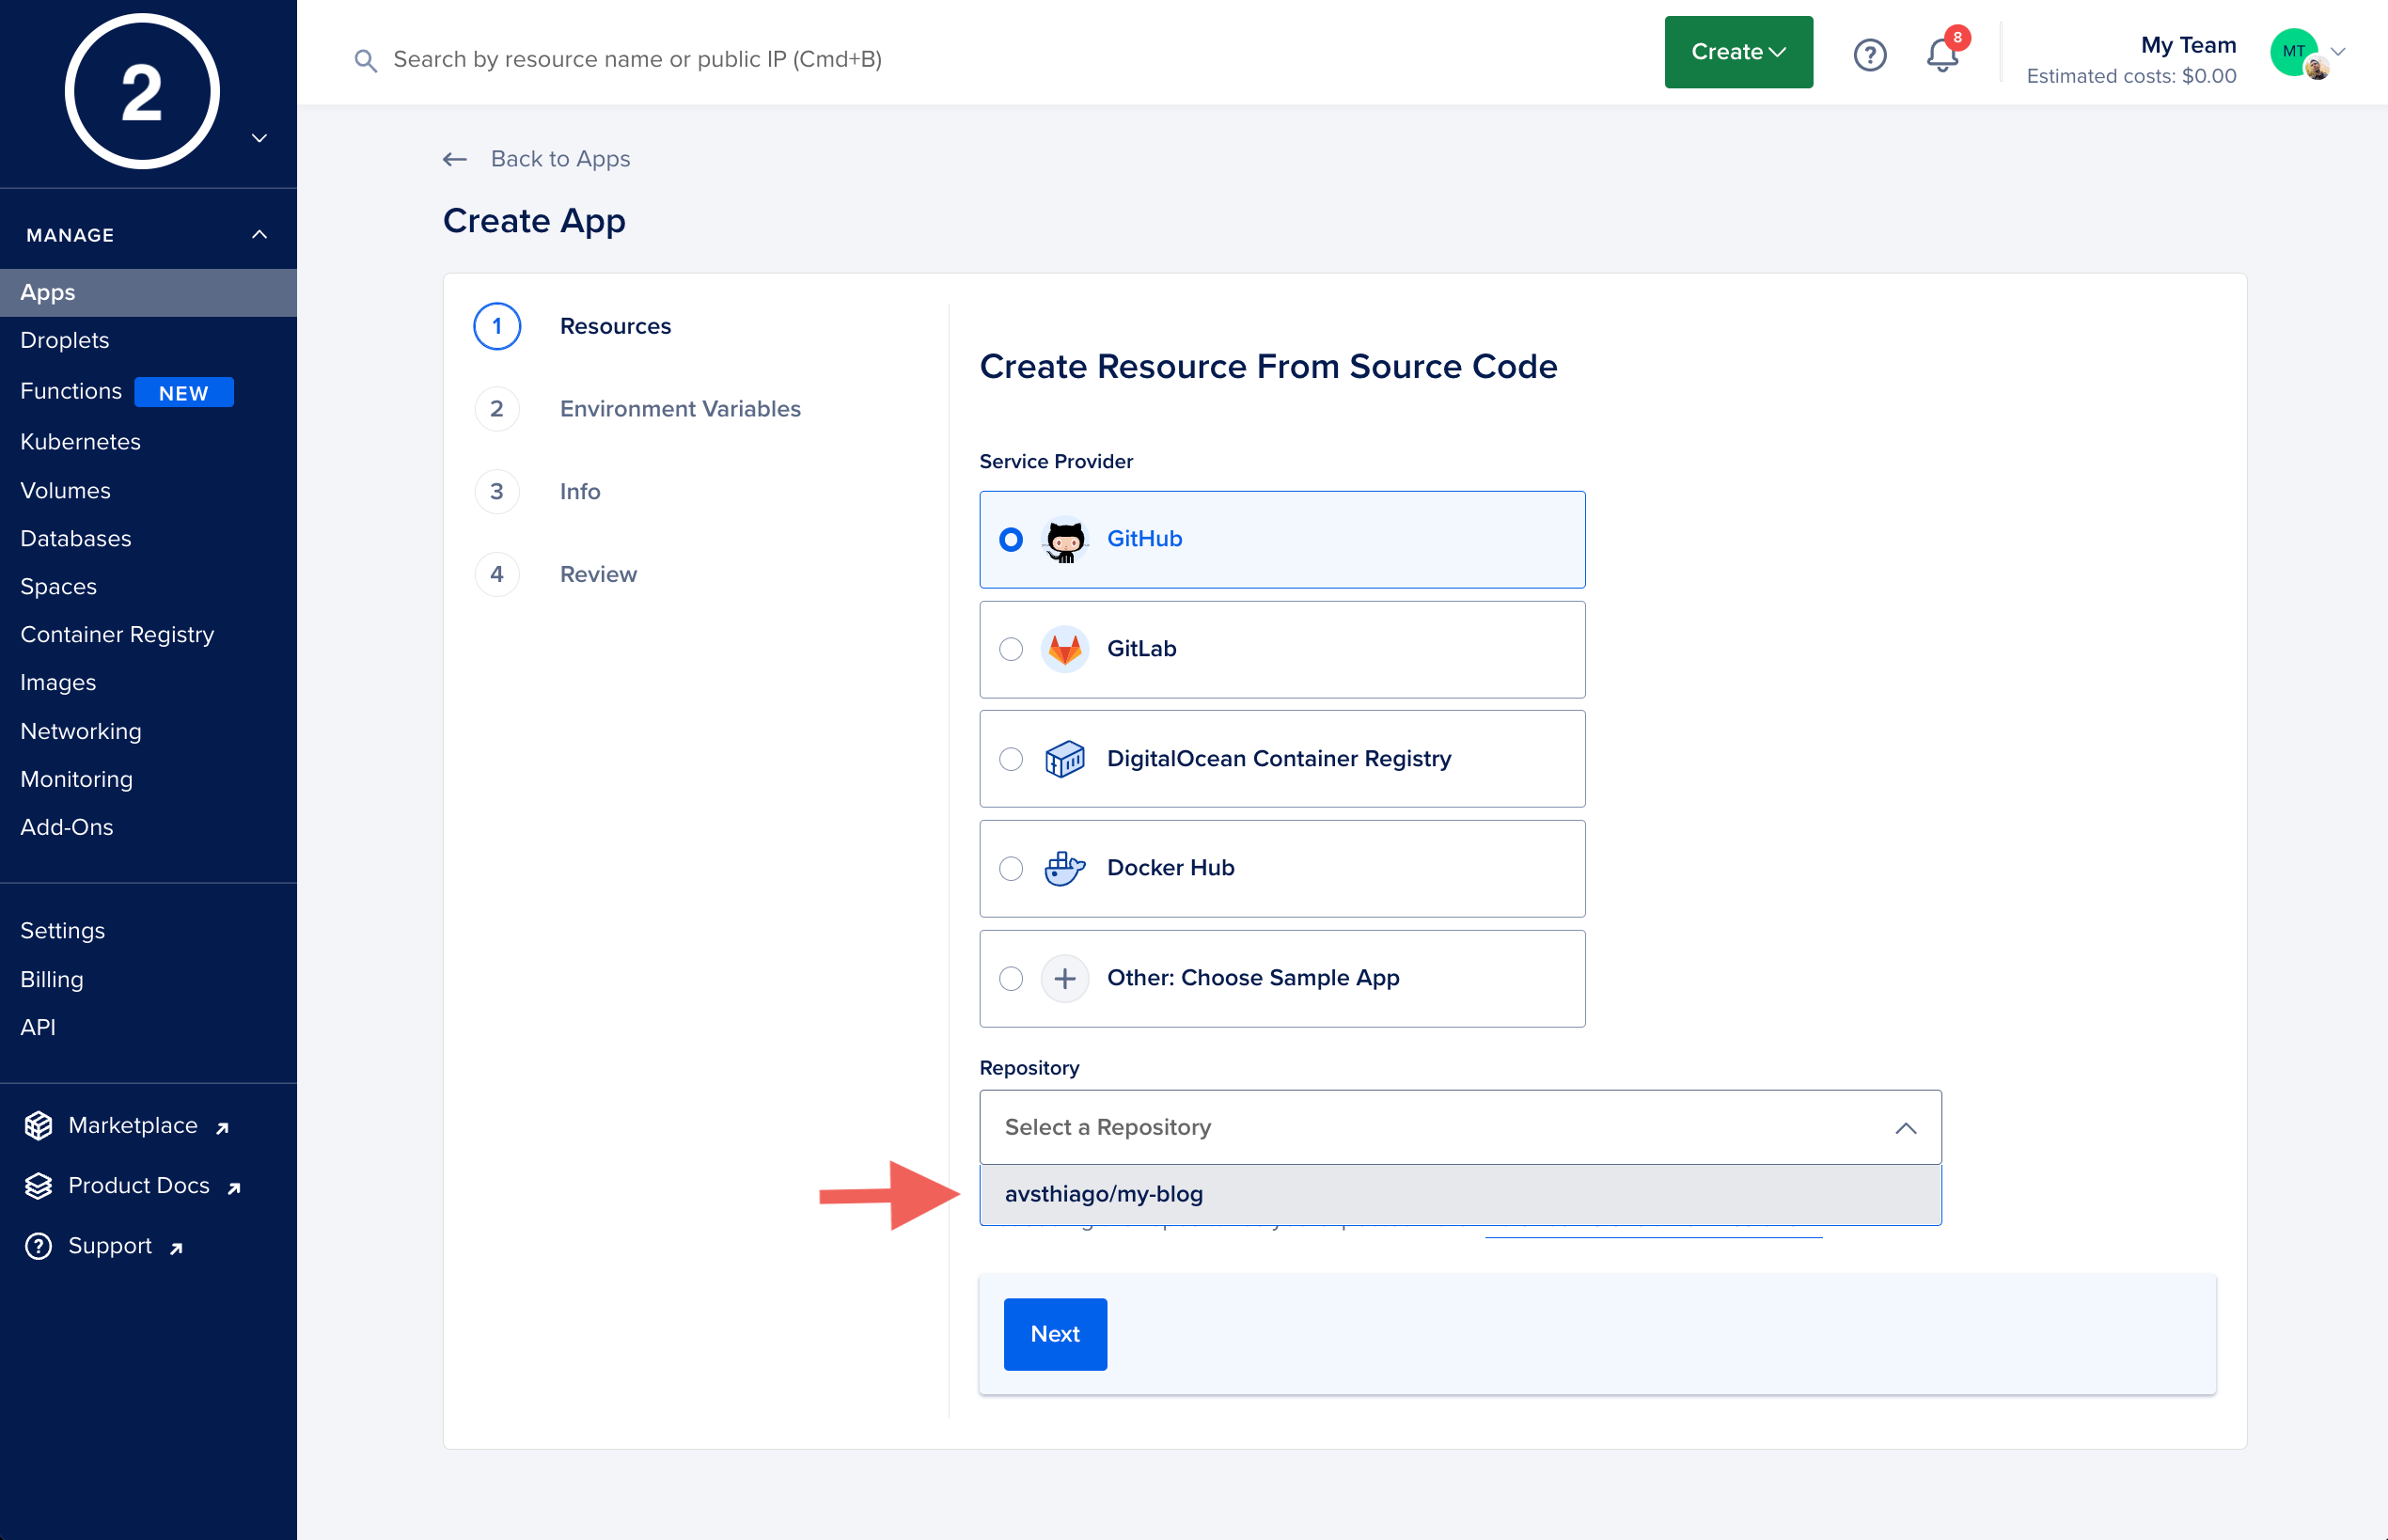
-
In the Create App page. You have to first grant GitHub access to your repository. Then, select the Repository in the first dropdown.
-
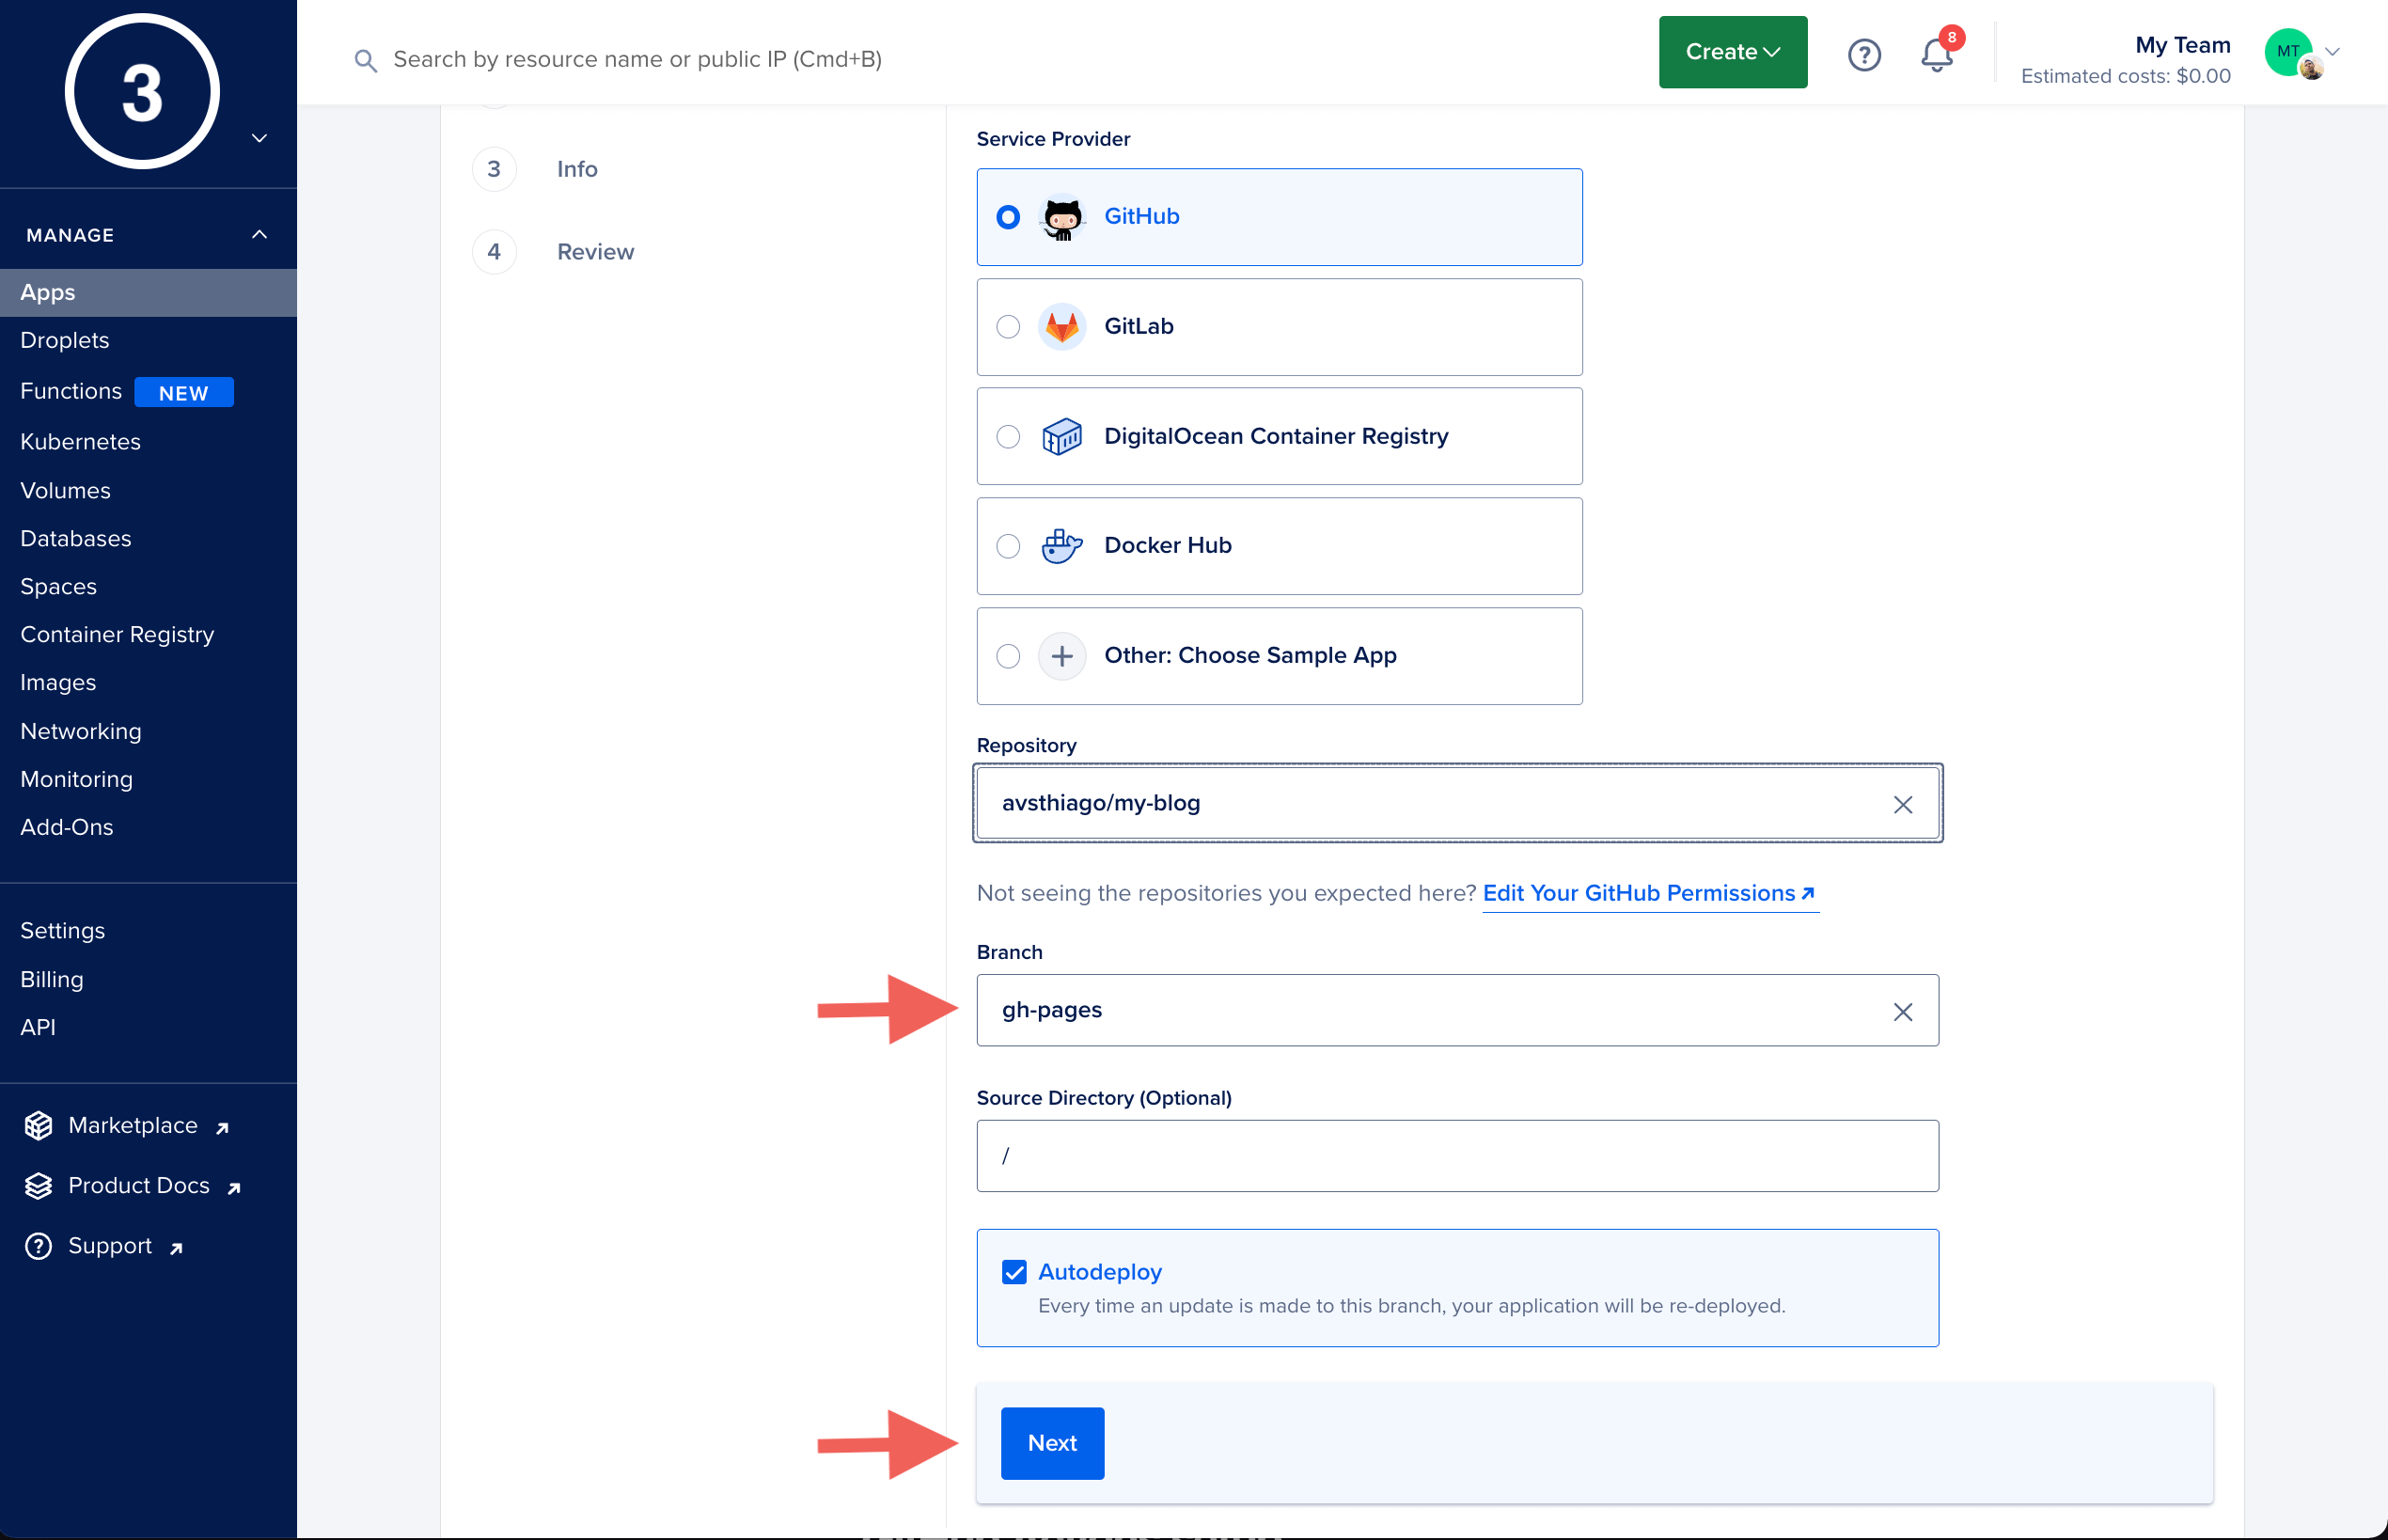
Select the branch where your website is in. For this example, I’m using gh-pages as mentioned in the GitHub Actions section. Then click Next.
-
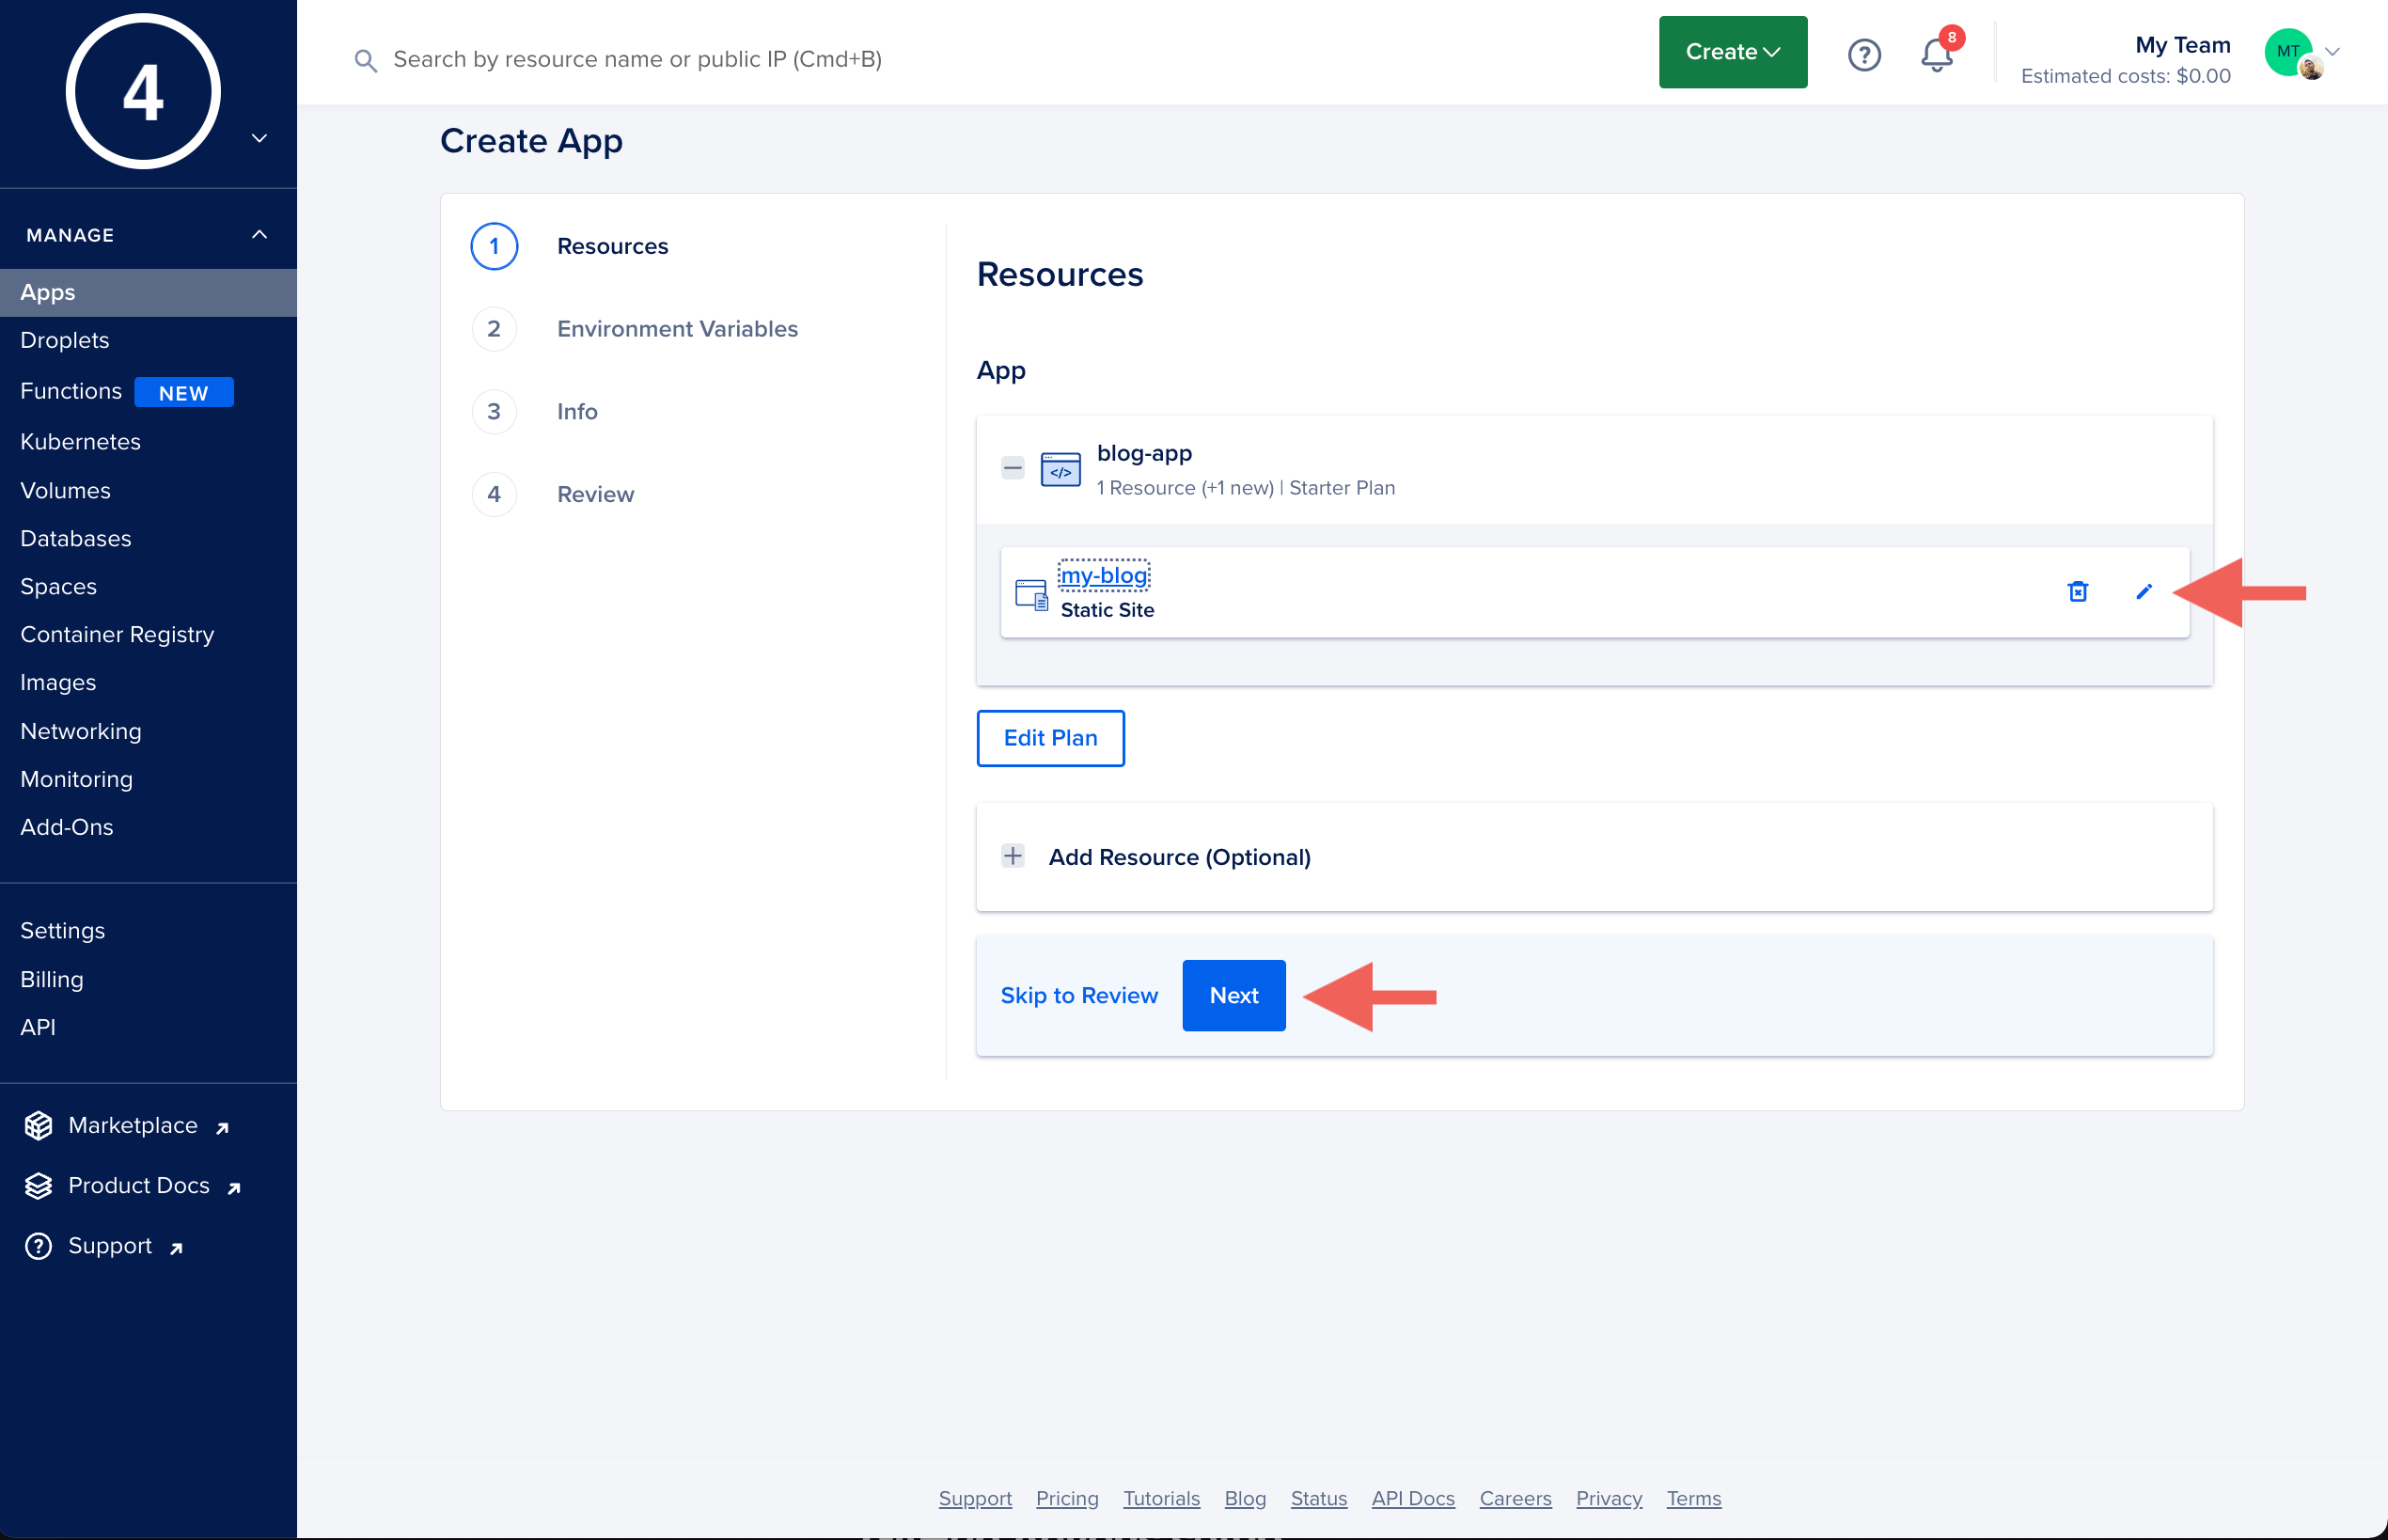
You can select here the name of your app by clicking on the pencil-shaped button. Then click Next.
-
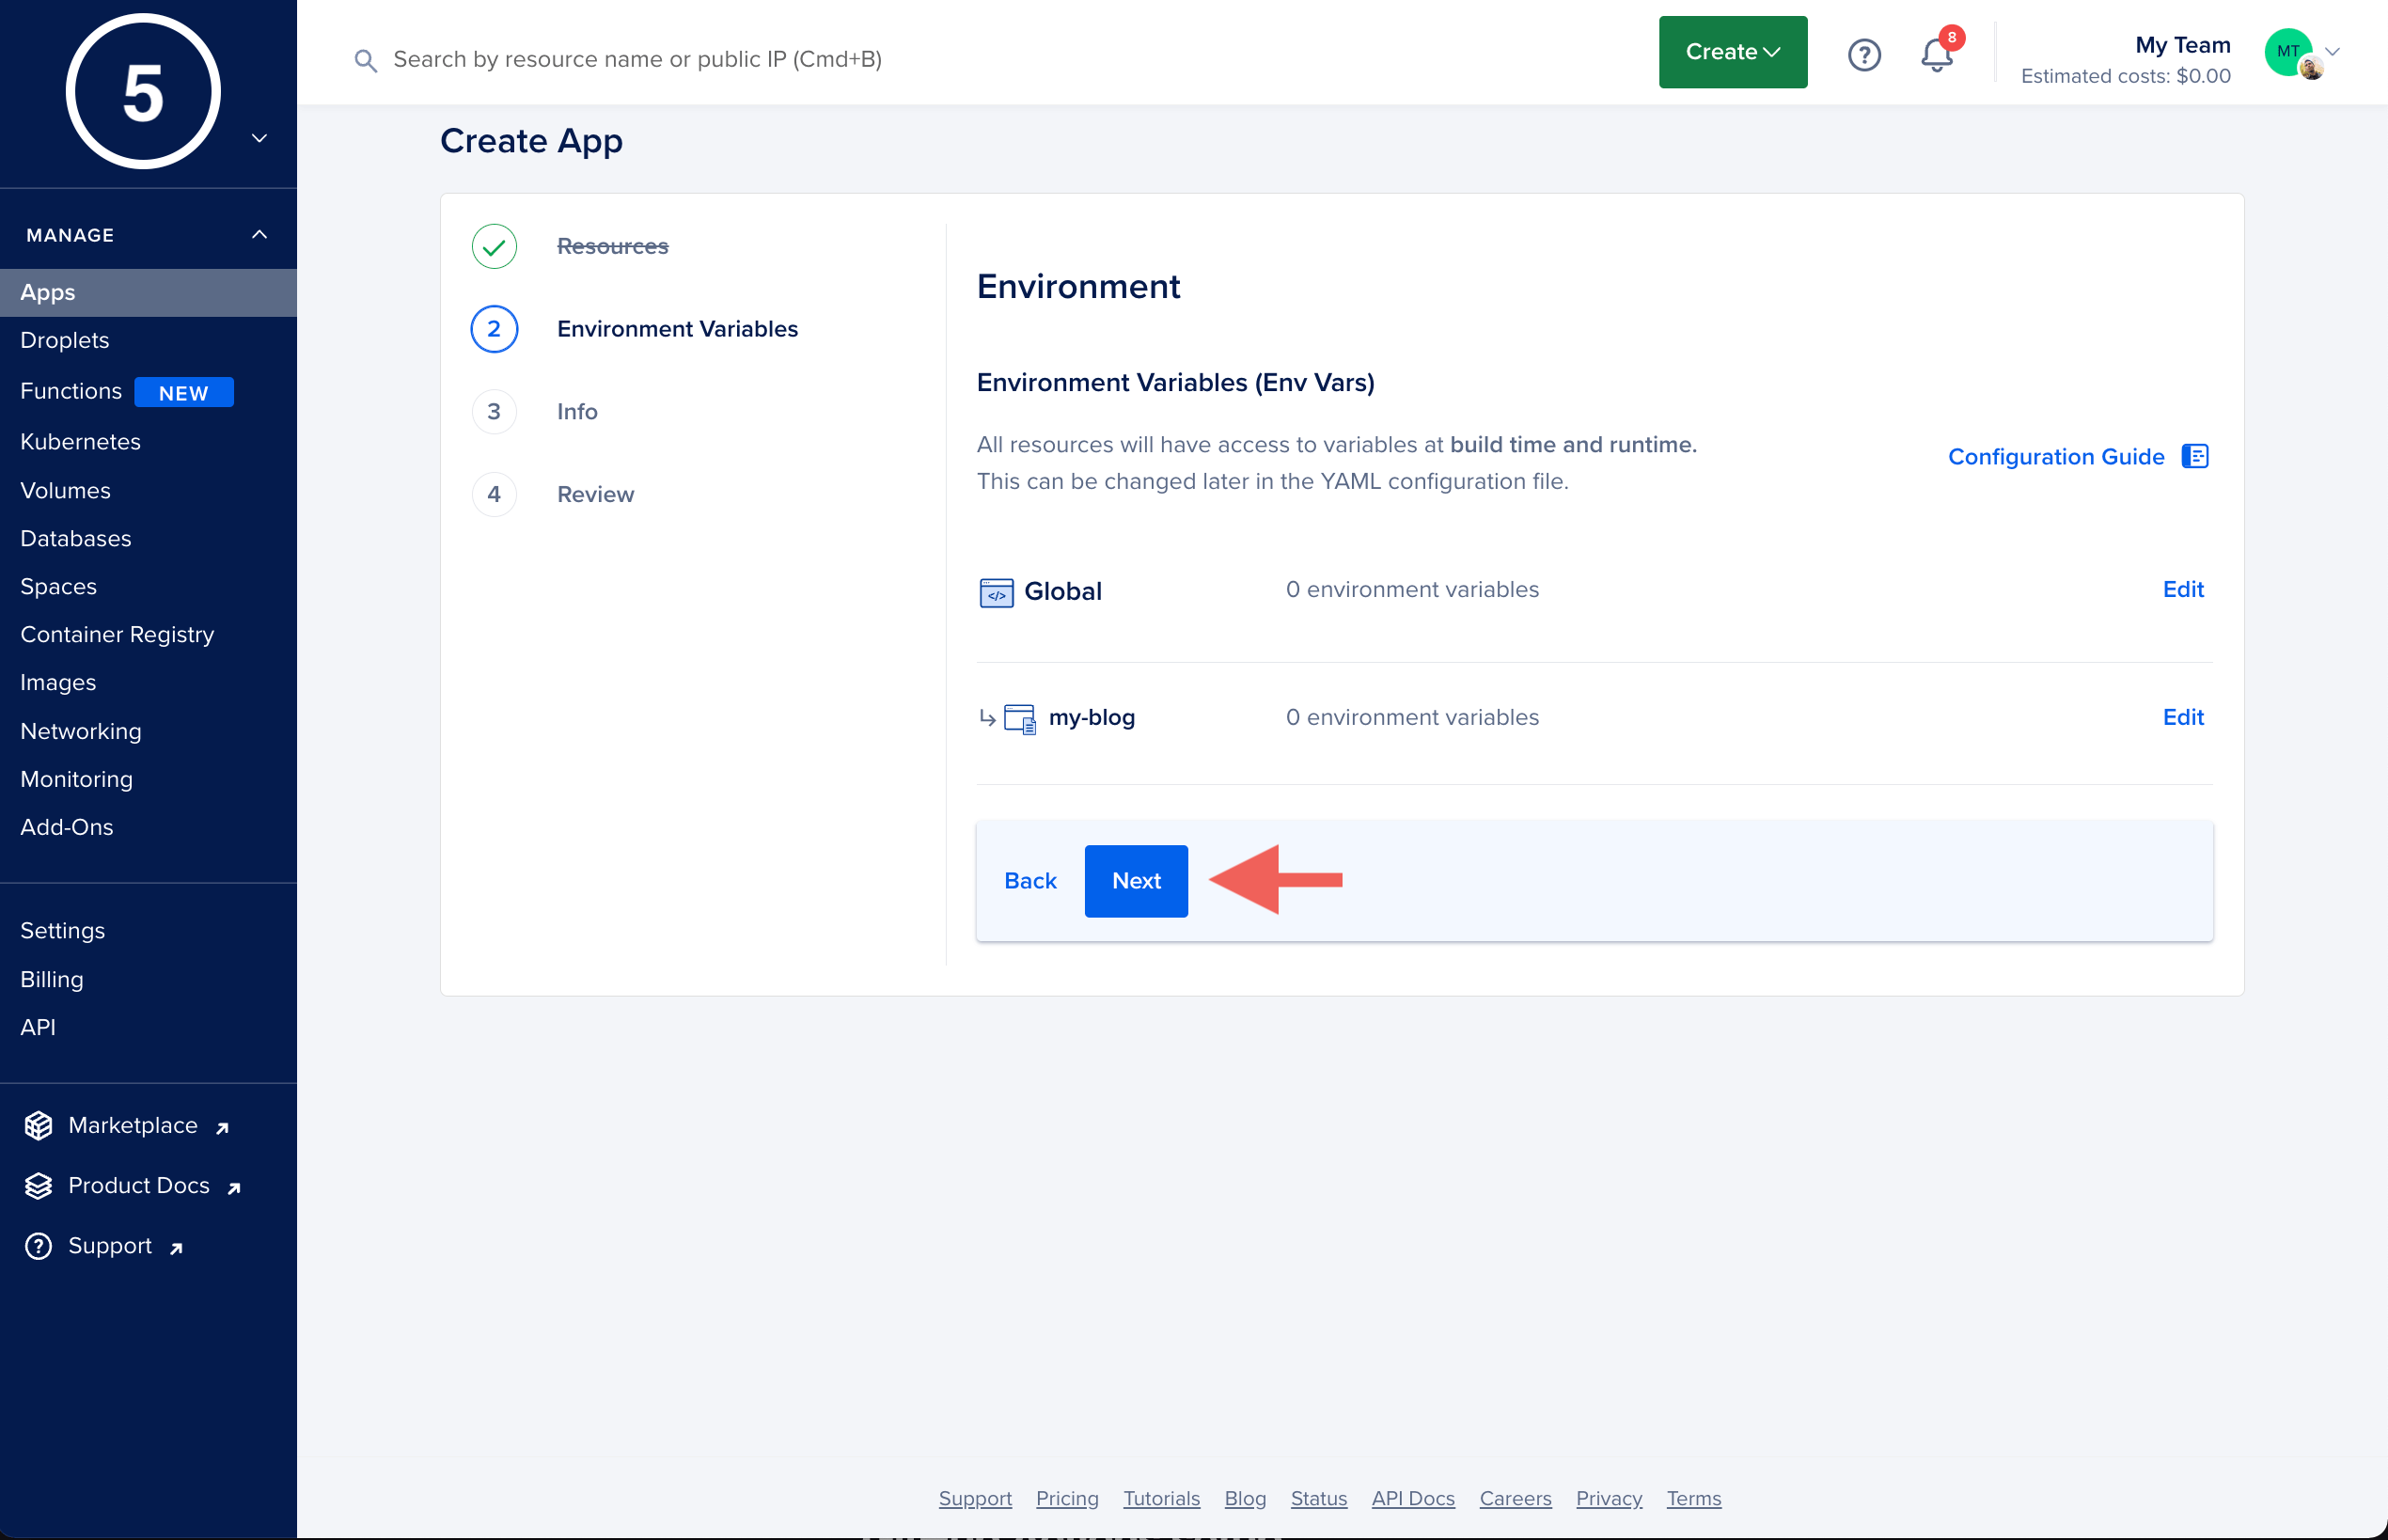
The App also allows us to use environment variables. Since we are not using in this example…Next.
-
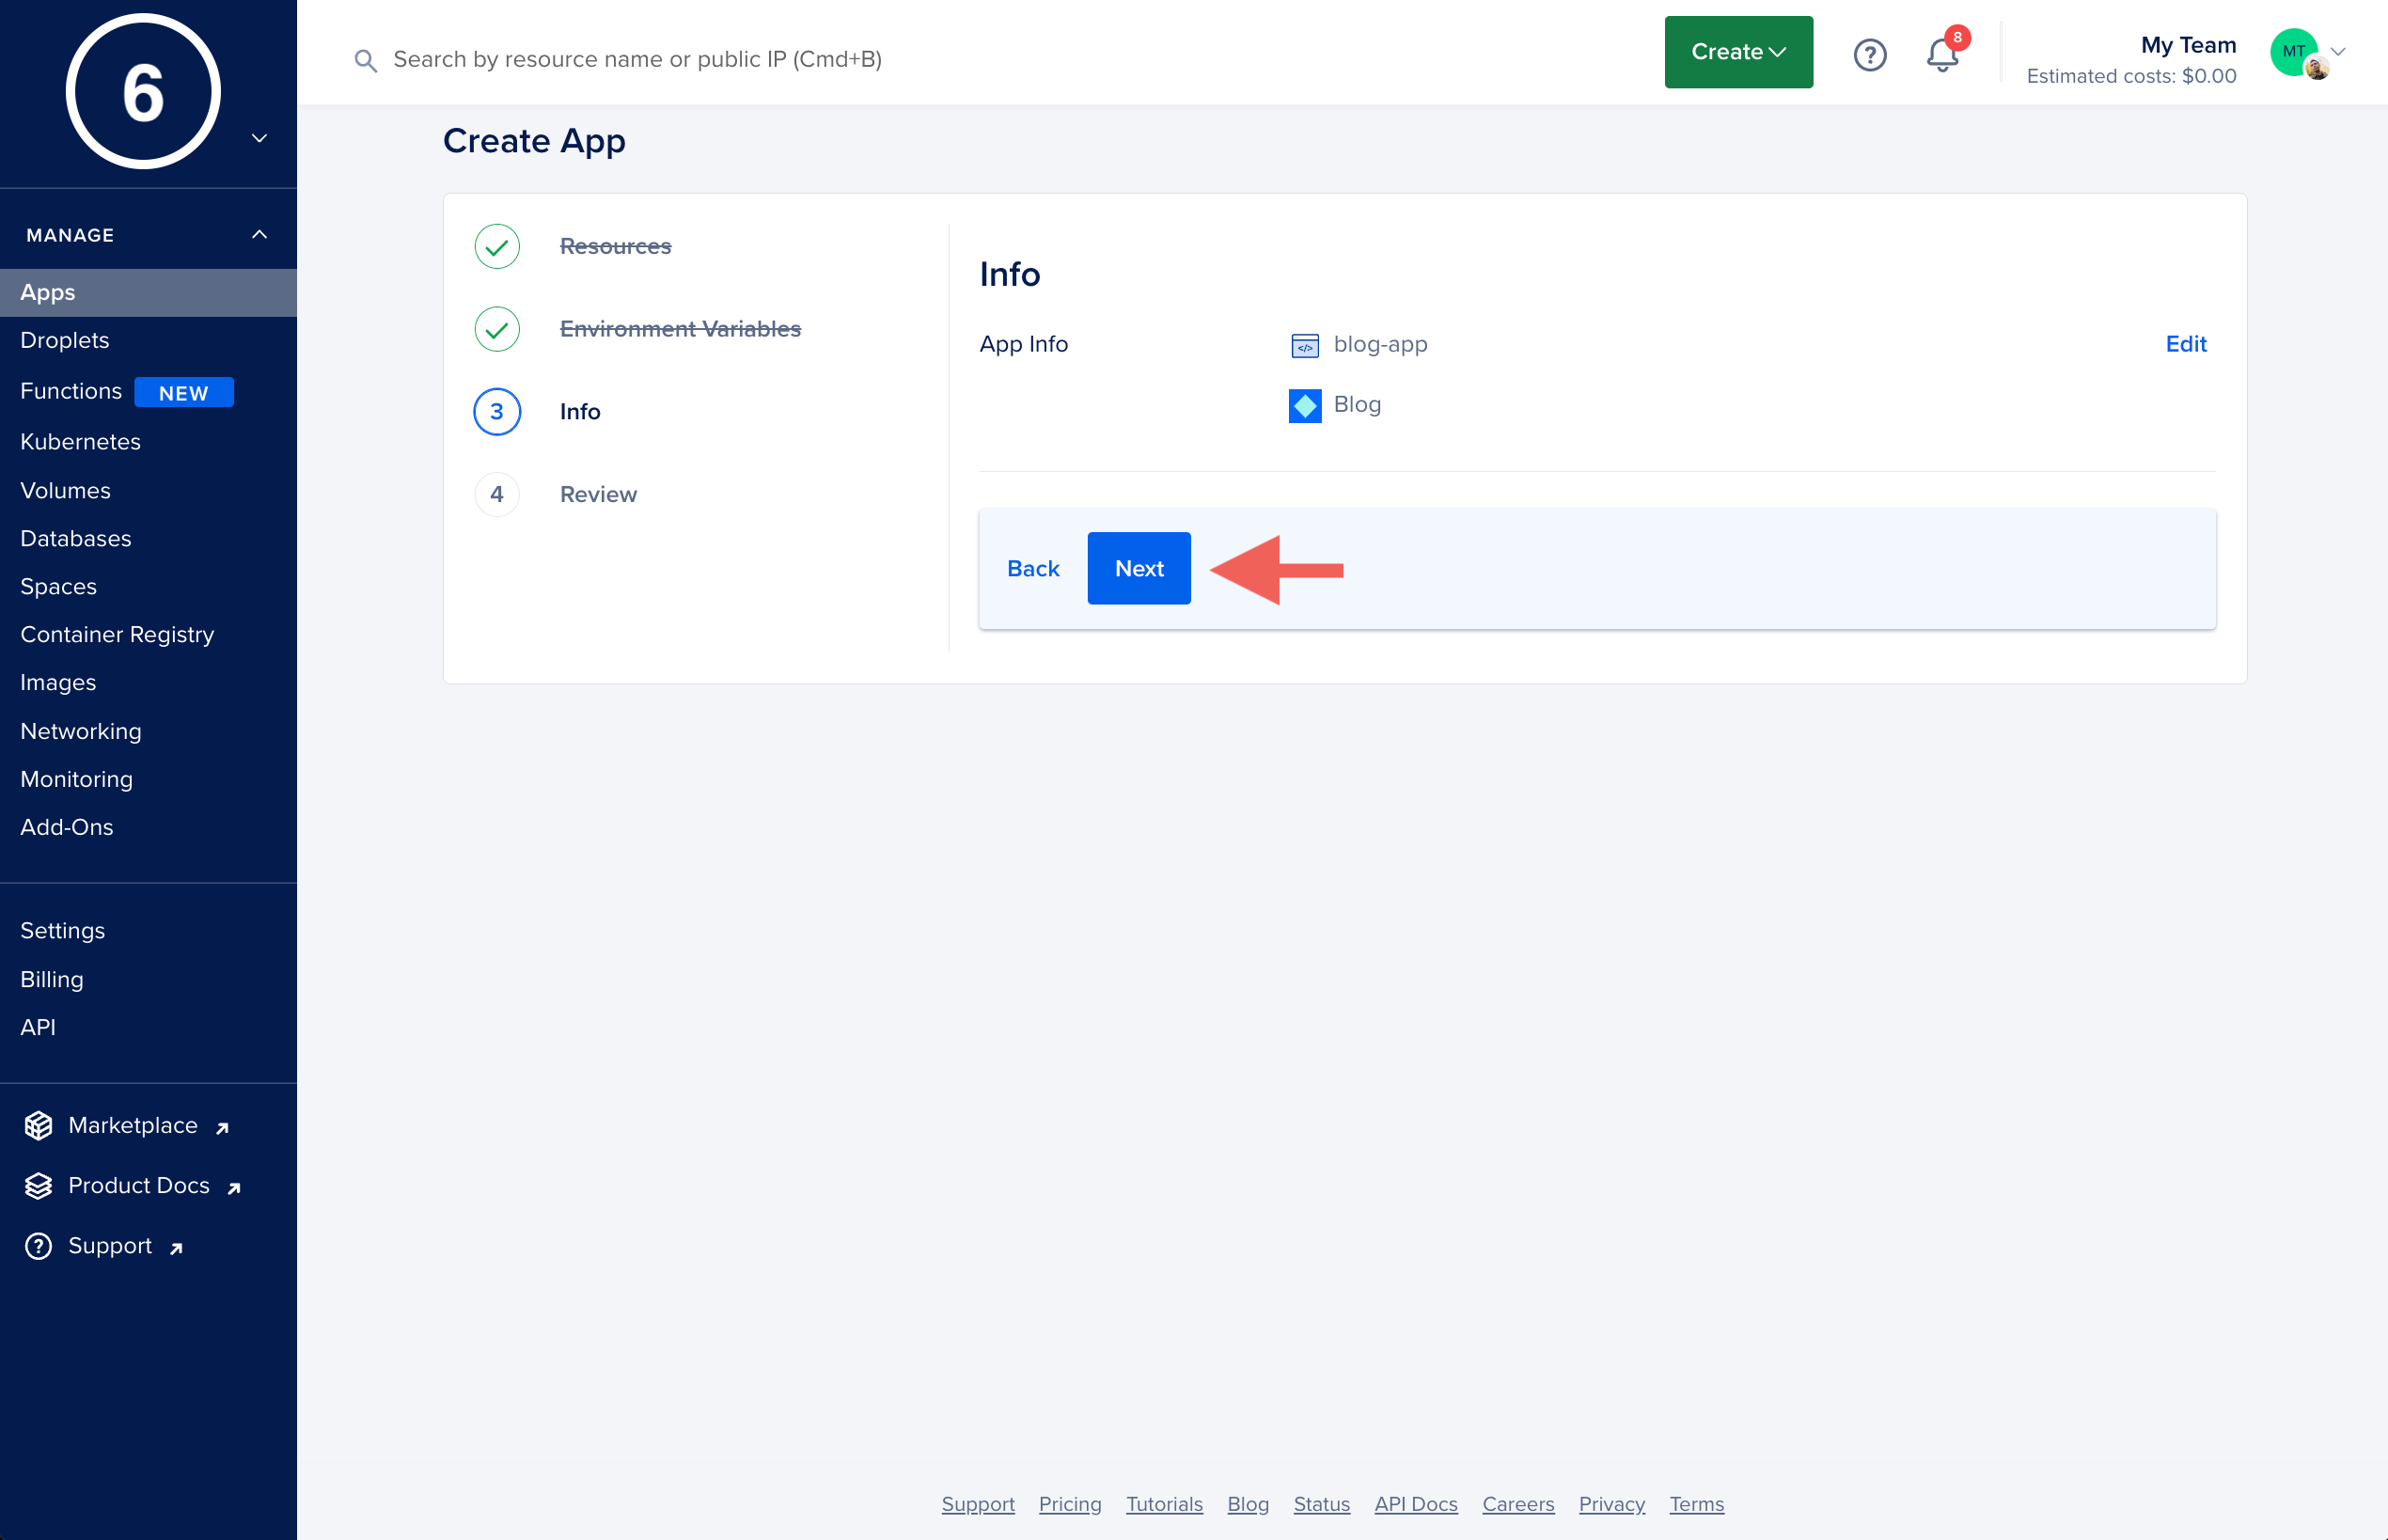
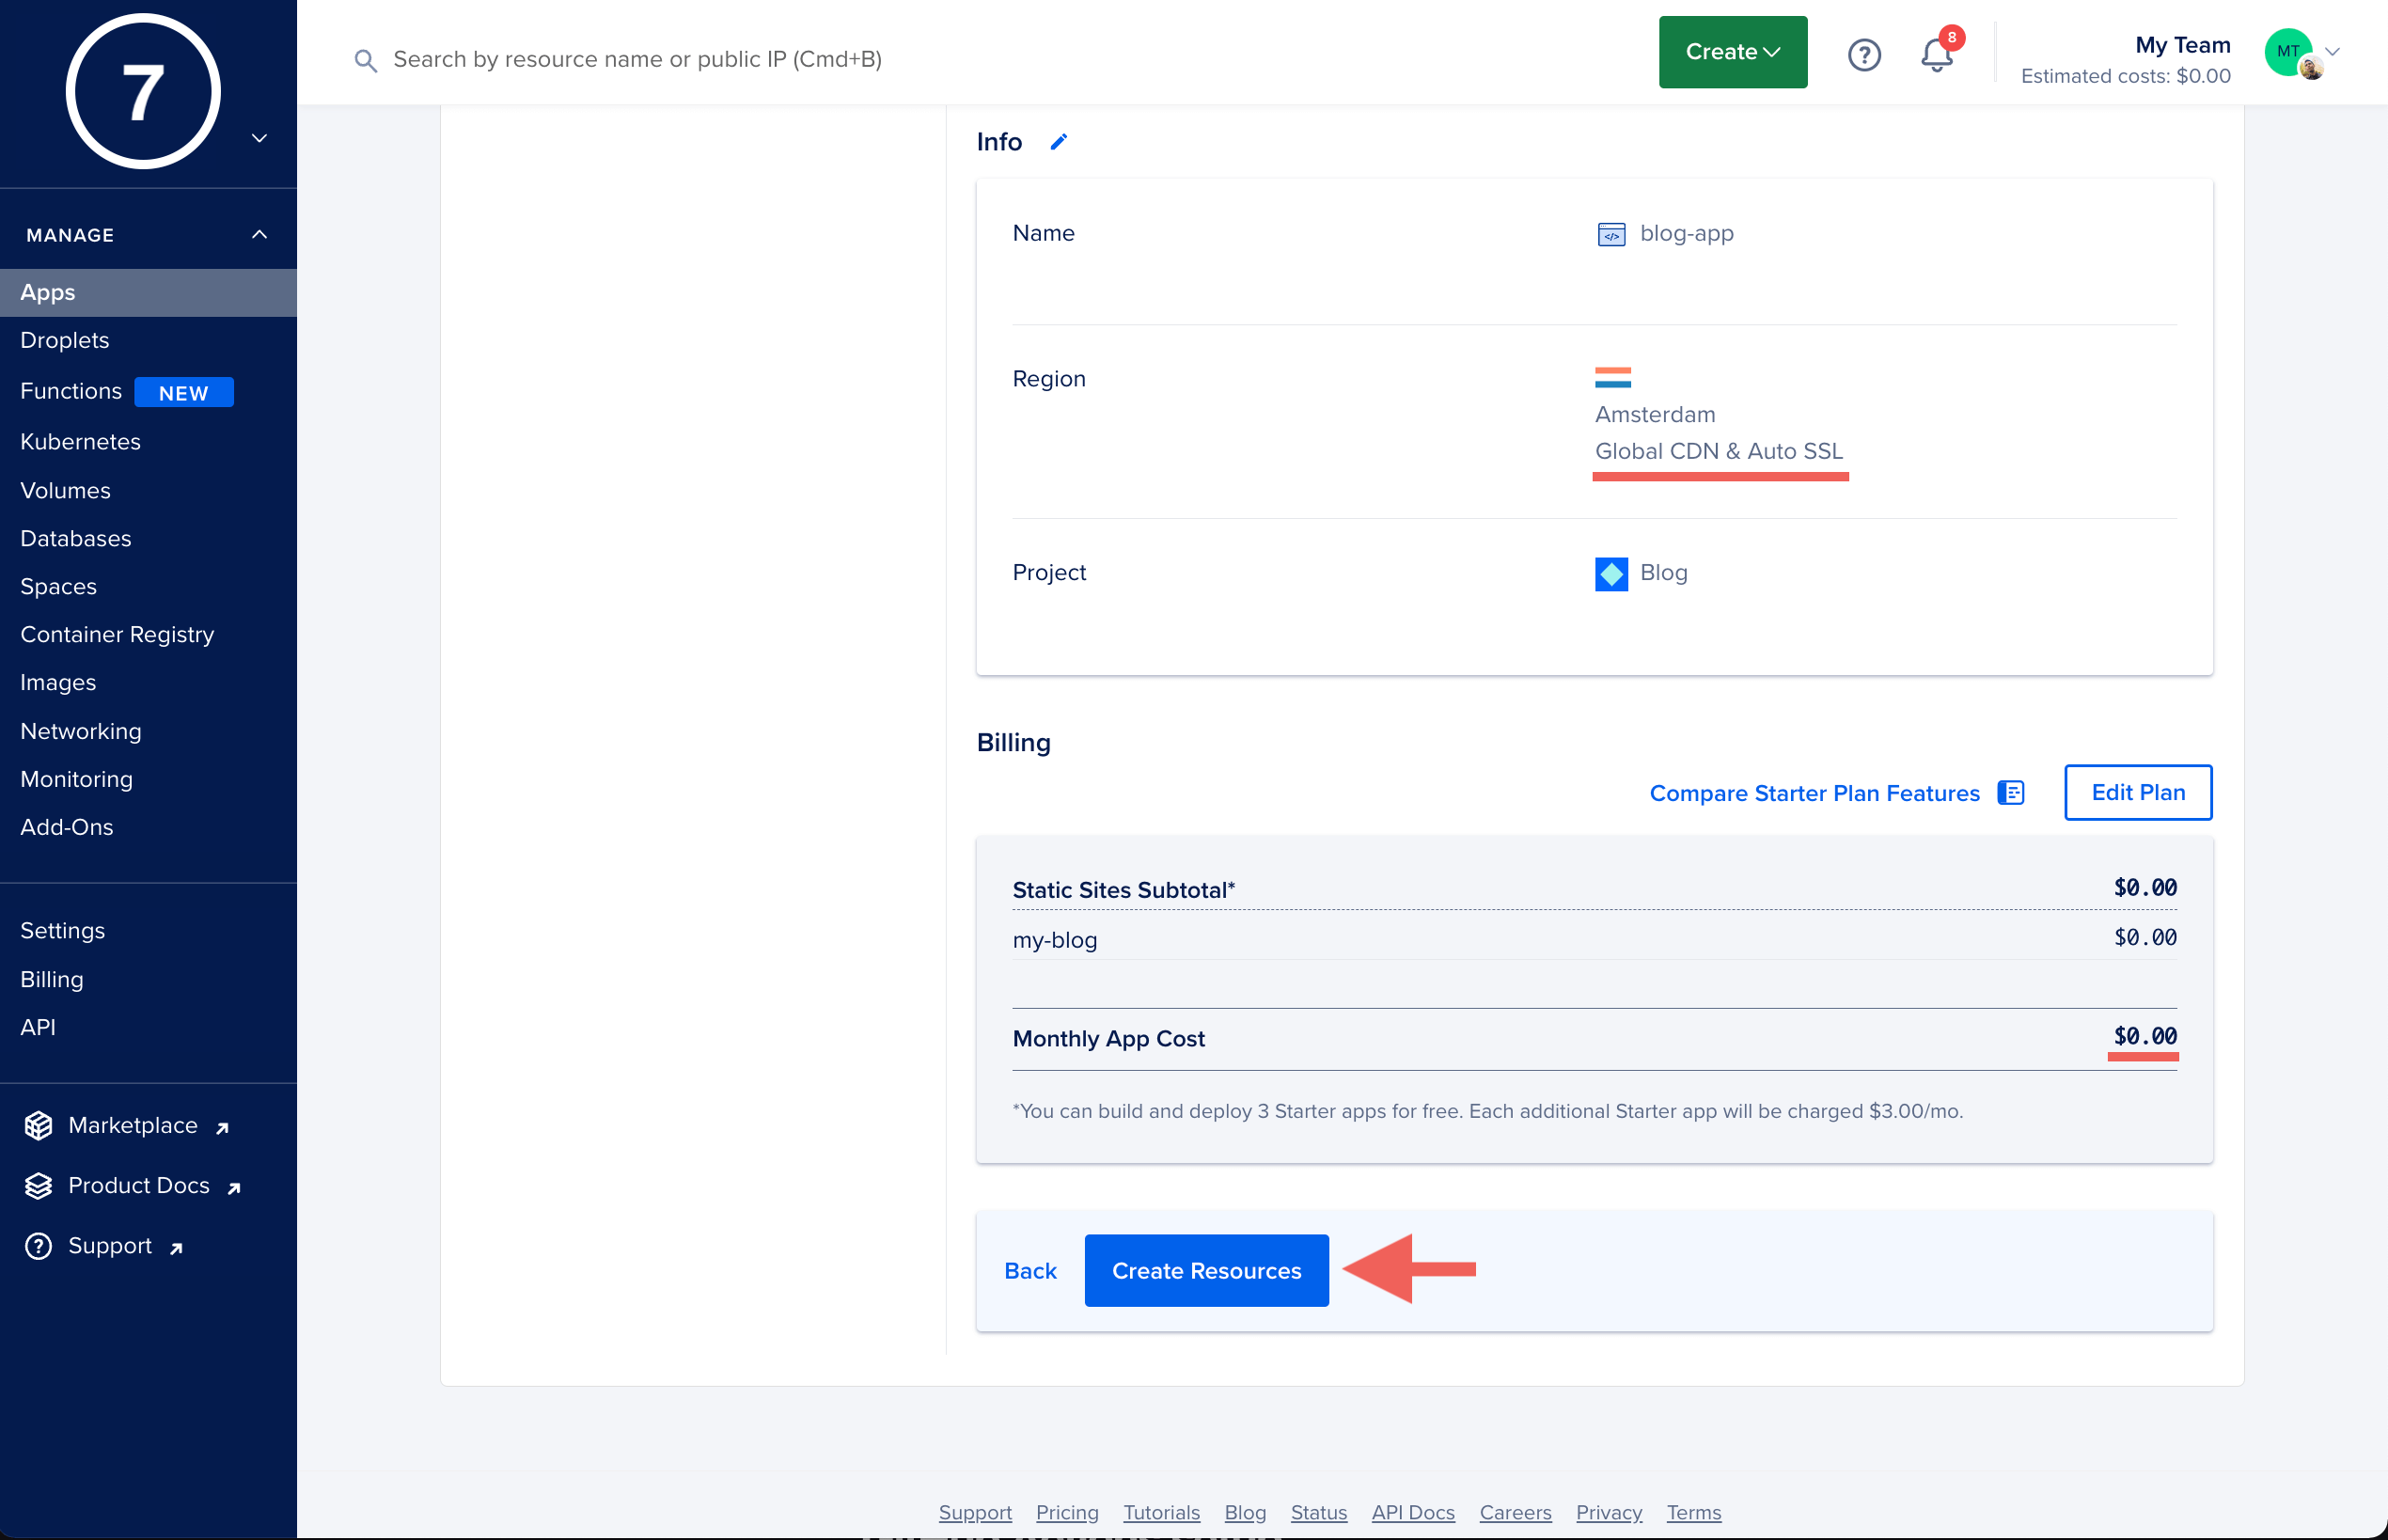
You are given another chance to change the information about your App here. Once you are ok with your choices, click Next.
-
This page shows you the overview of what is going to be created. We see that it will cost us $0.00 which is AWESOME!! We also see that the access to the App will be SSL encrypted by default and the content of the website will be cached in different parts of the globe by using a Global CDN. Click Create Resources.
-
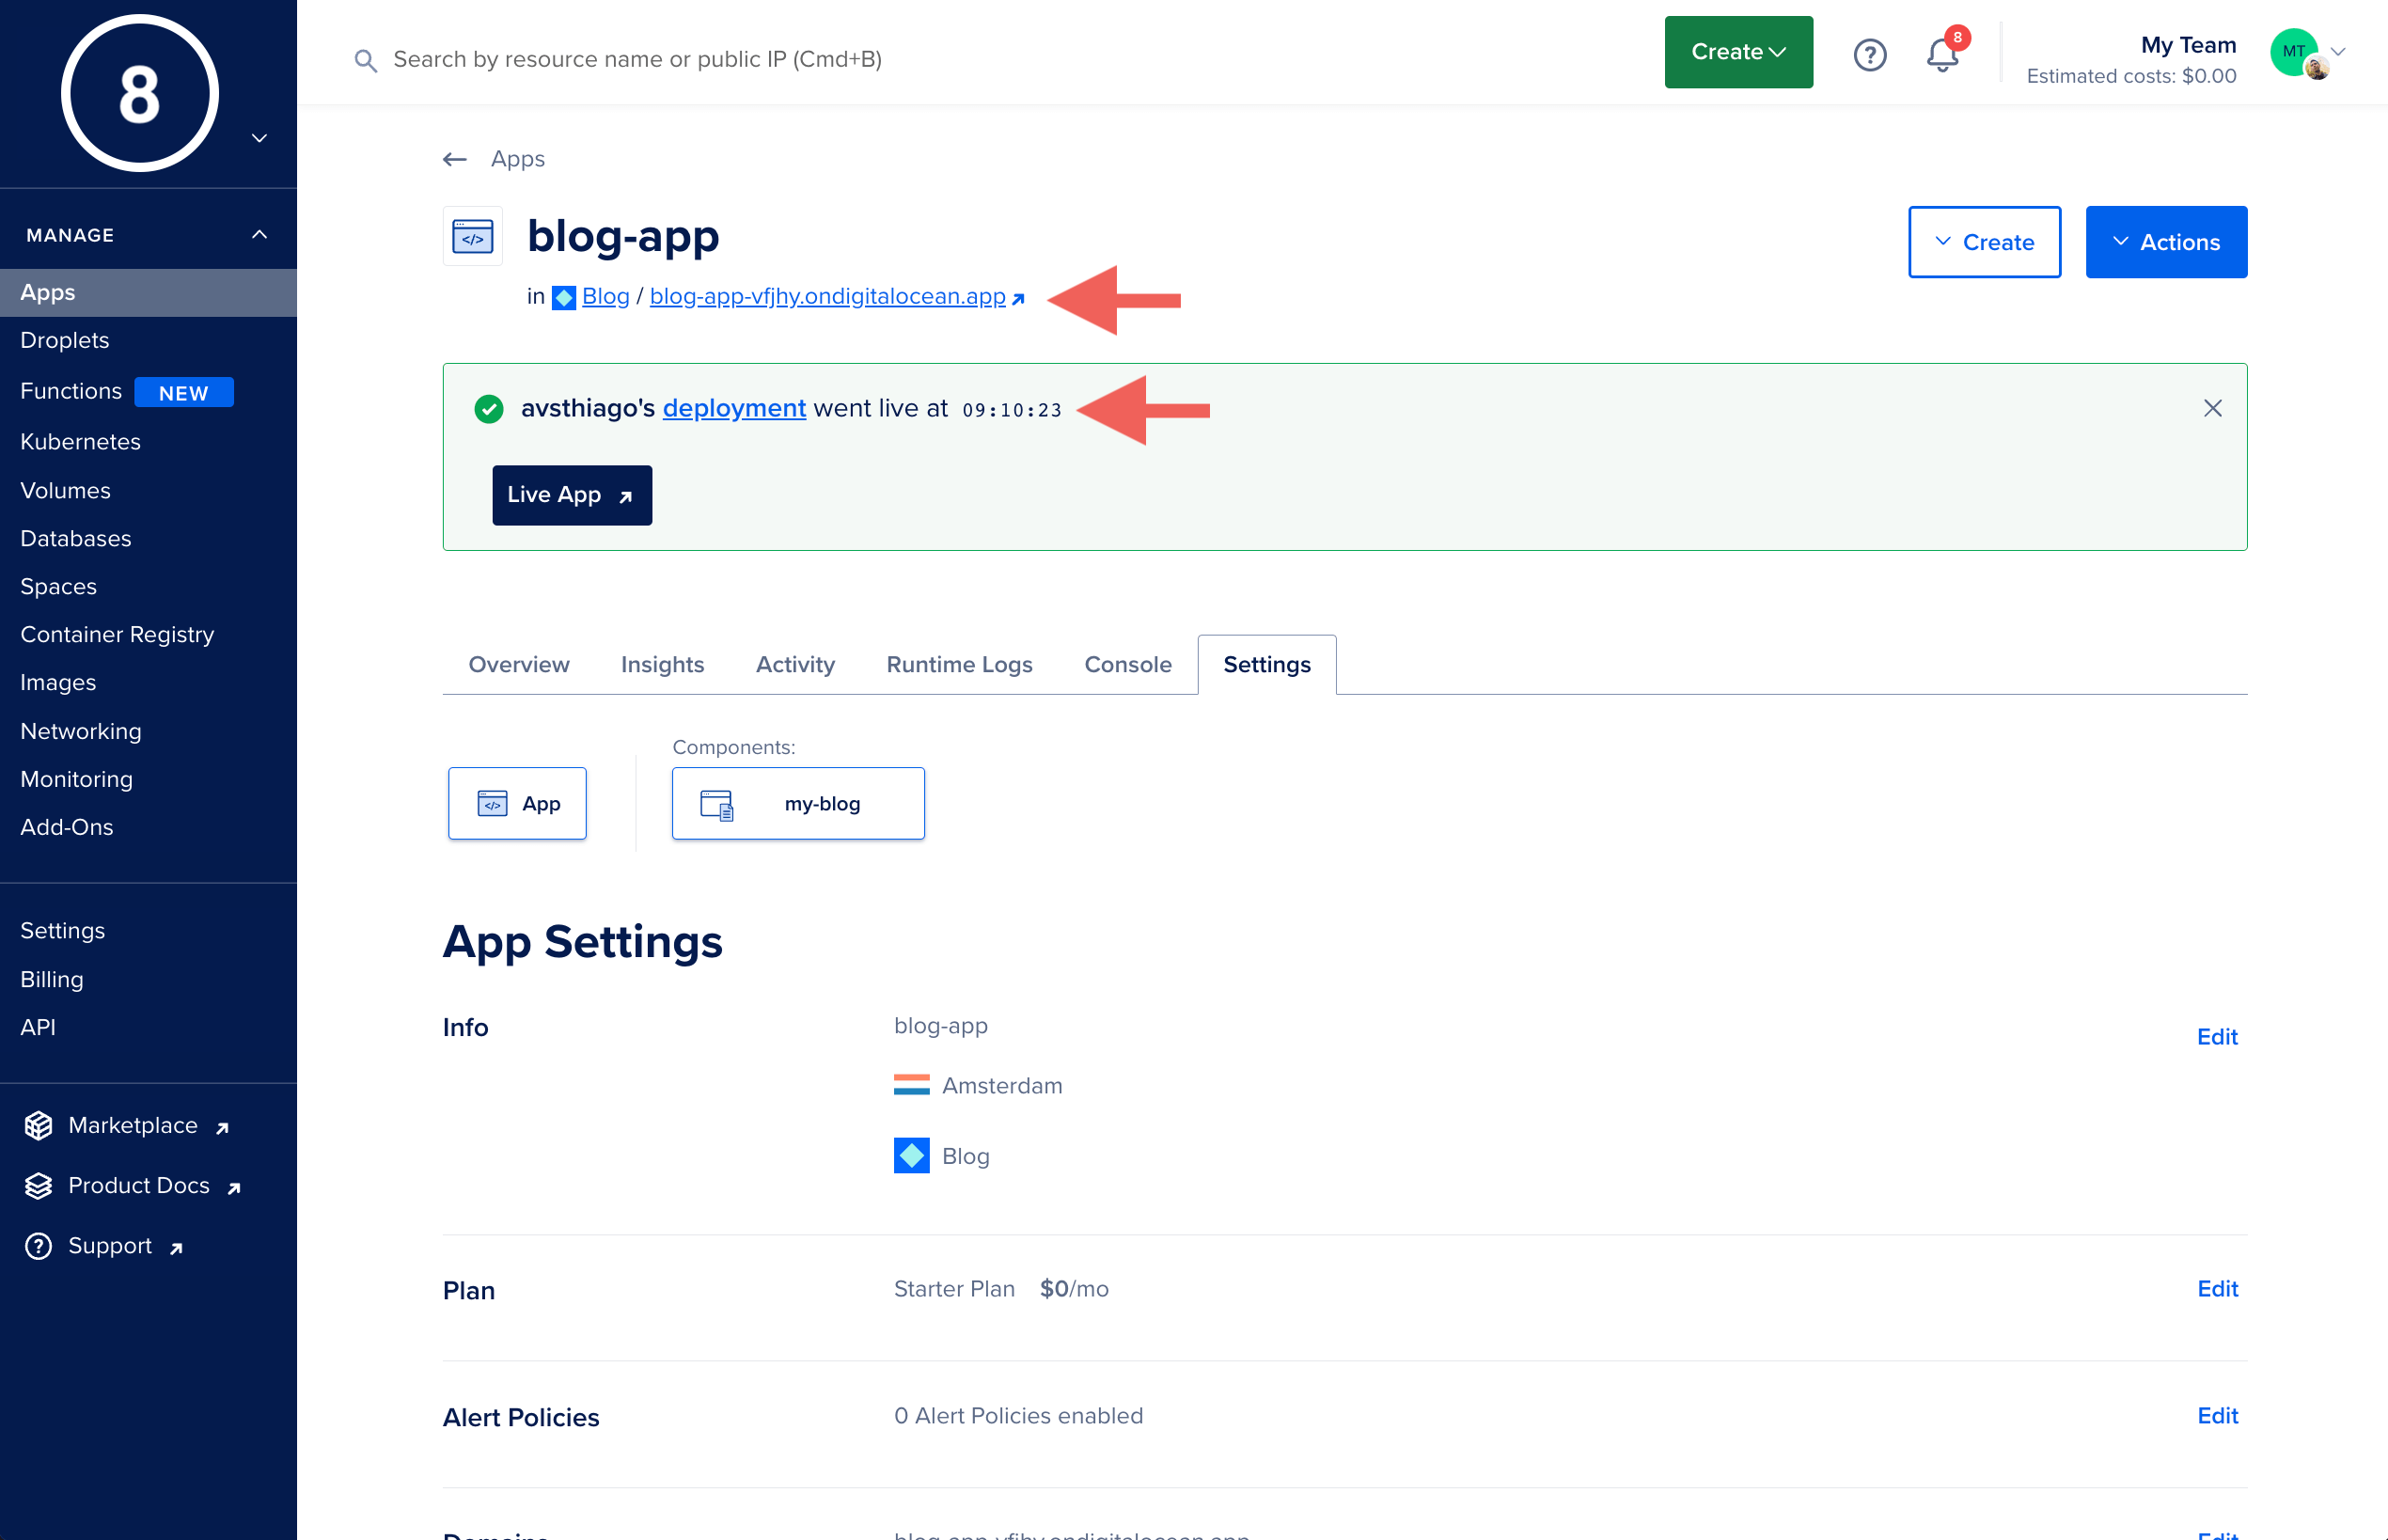
After a few seconds, your website gets deployed. You can now click on the Live App to view your website. The red arrow shows where you can find the URL.
-
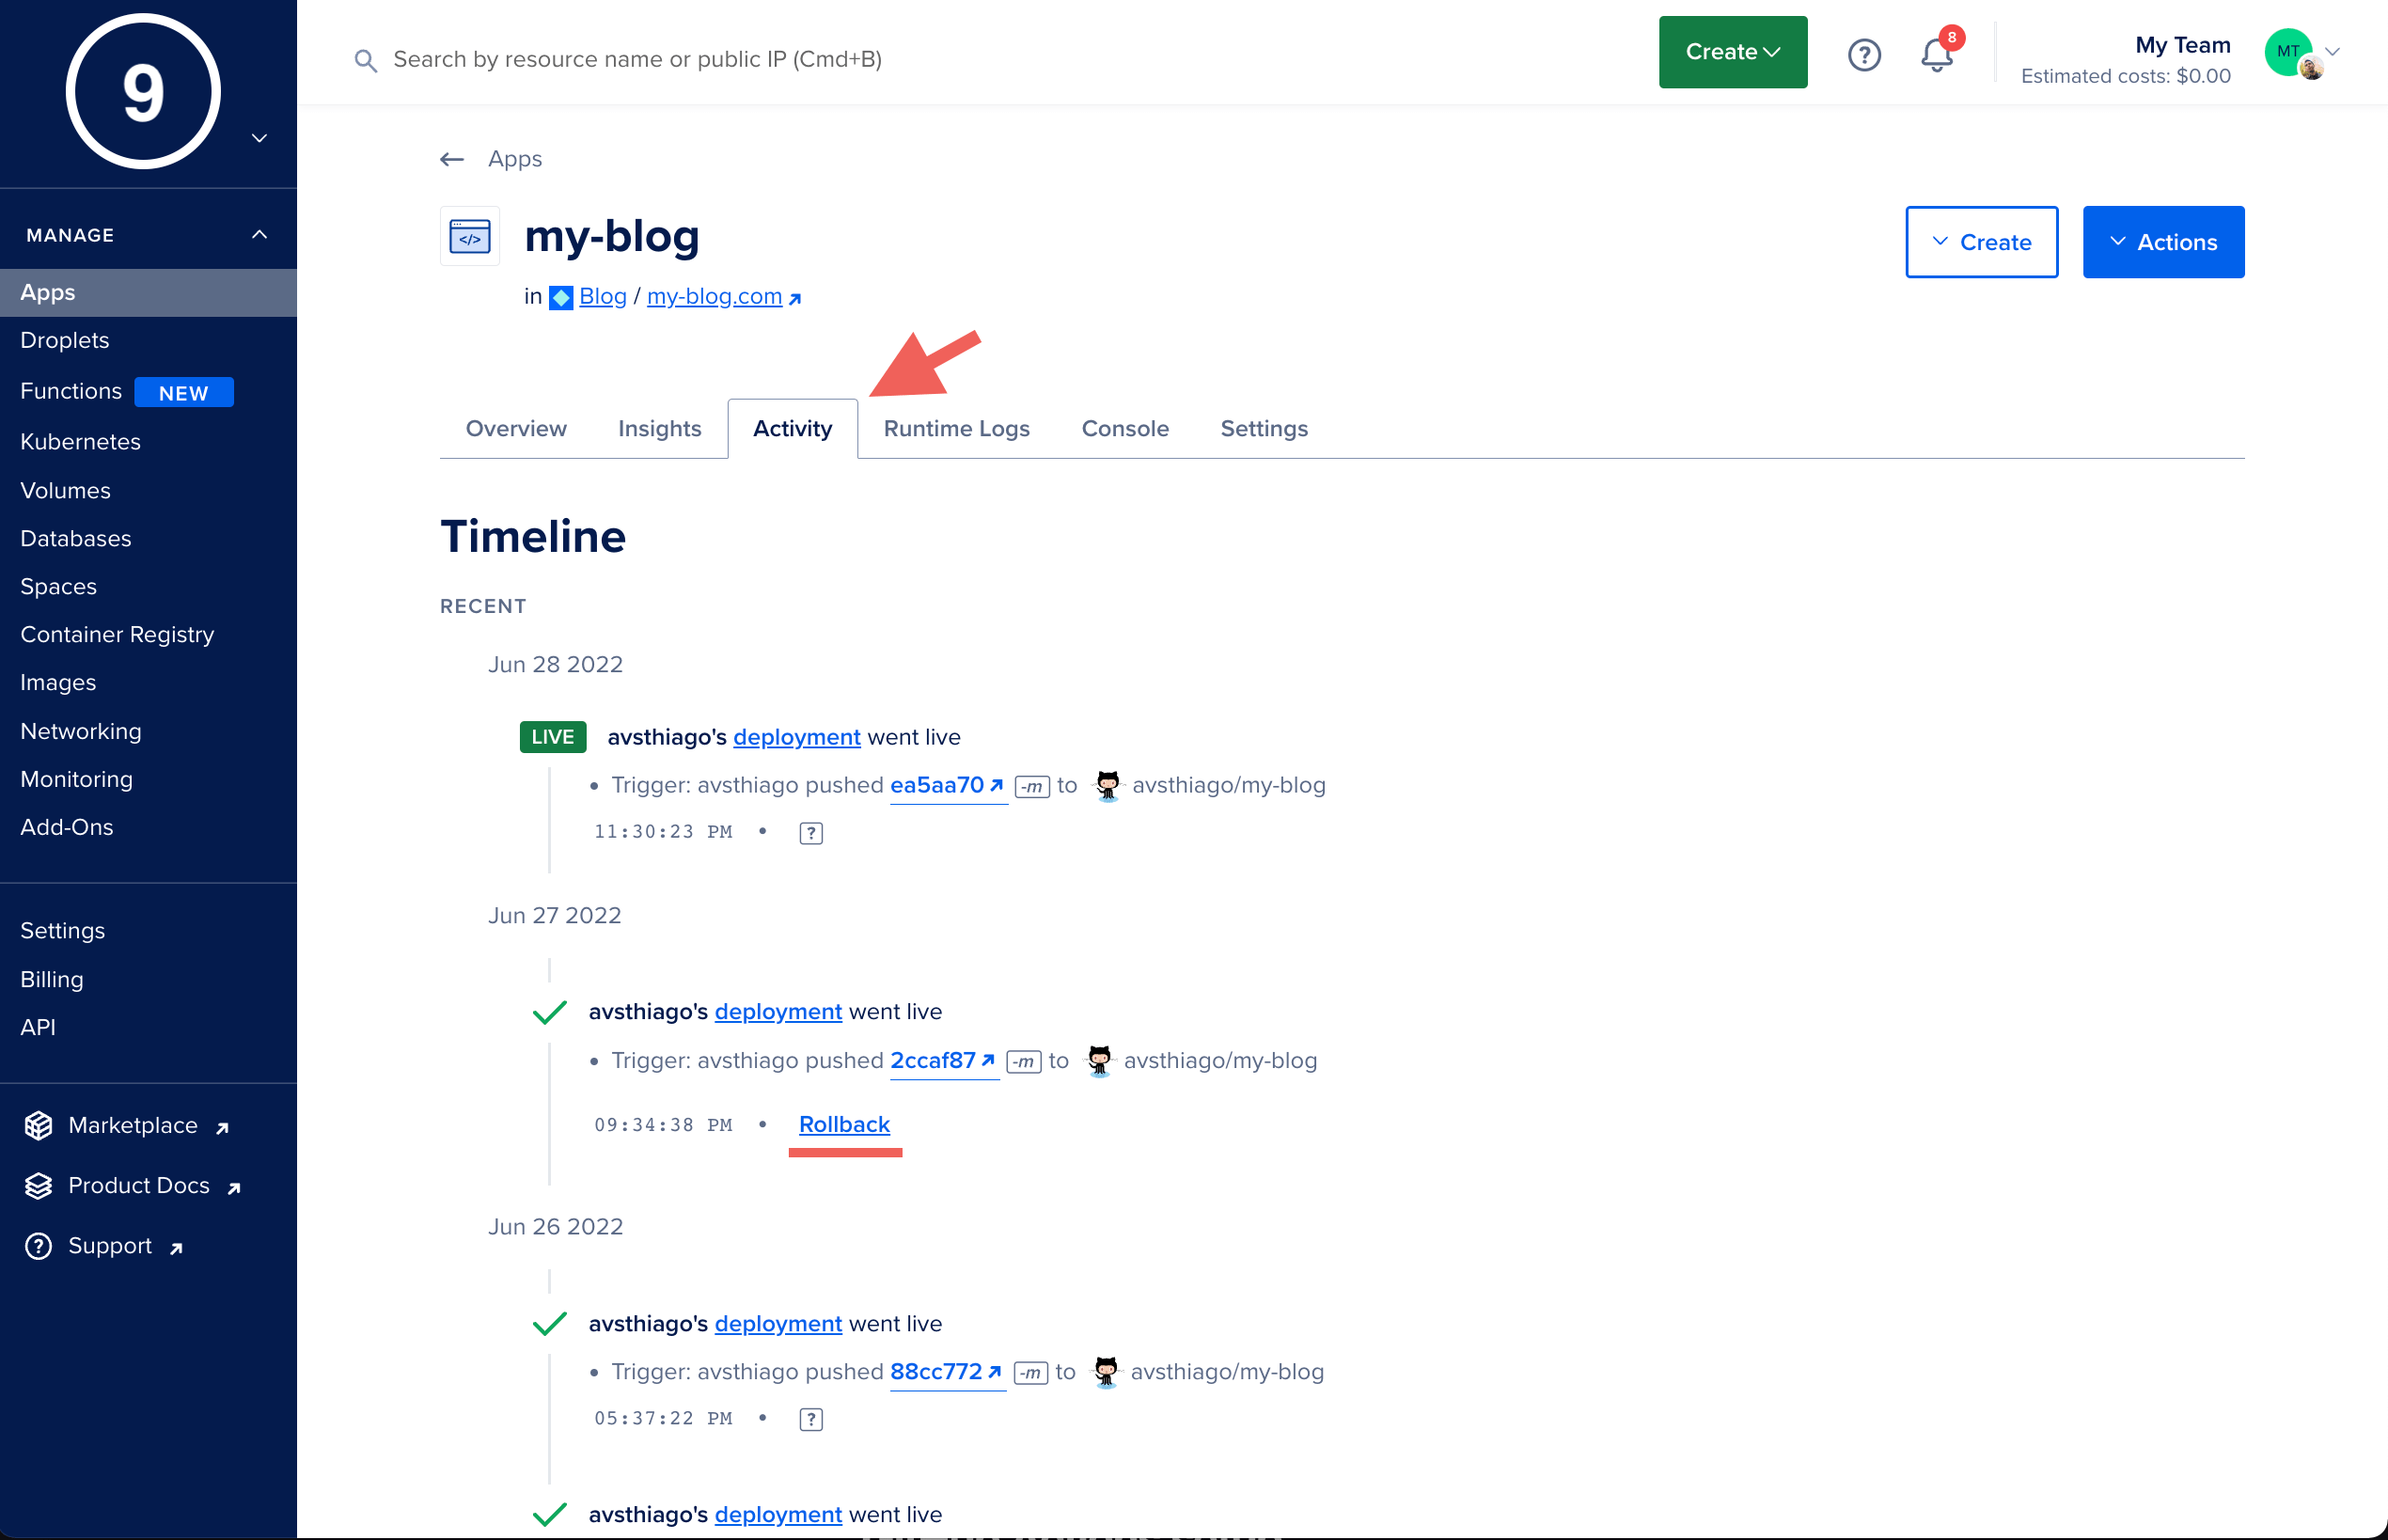
Disaster recovery plan. If something goes wrong with the deployment you can go to the Activity tab and click Rollback to the previous version.
Take aways
In this article, we discussed how to create a static website using Jekyll. Then we set up a CICD pipeline driven by the GitHub Actions and the Digital Ocean Apps to build and deploy our site.
I hope you enjoyed it. See you in the next post ;)